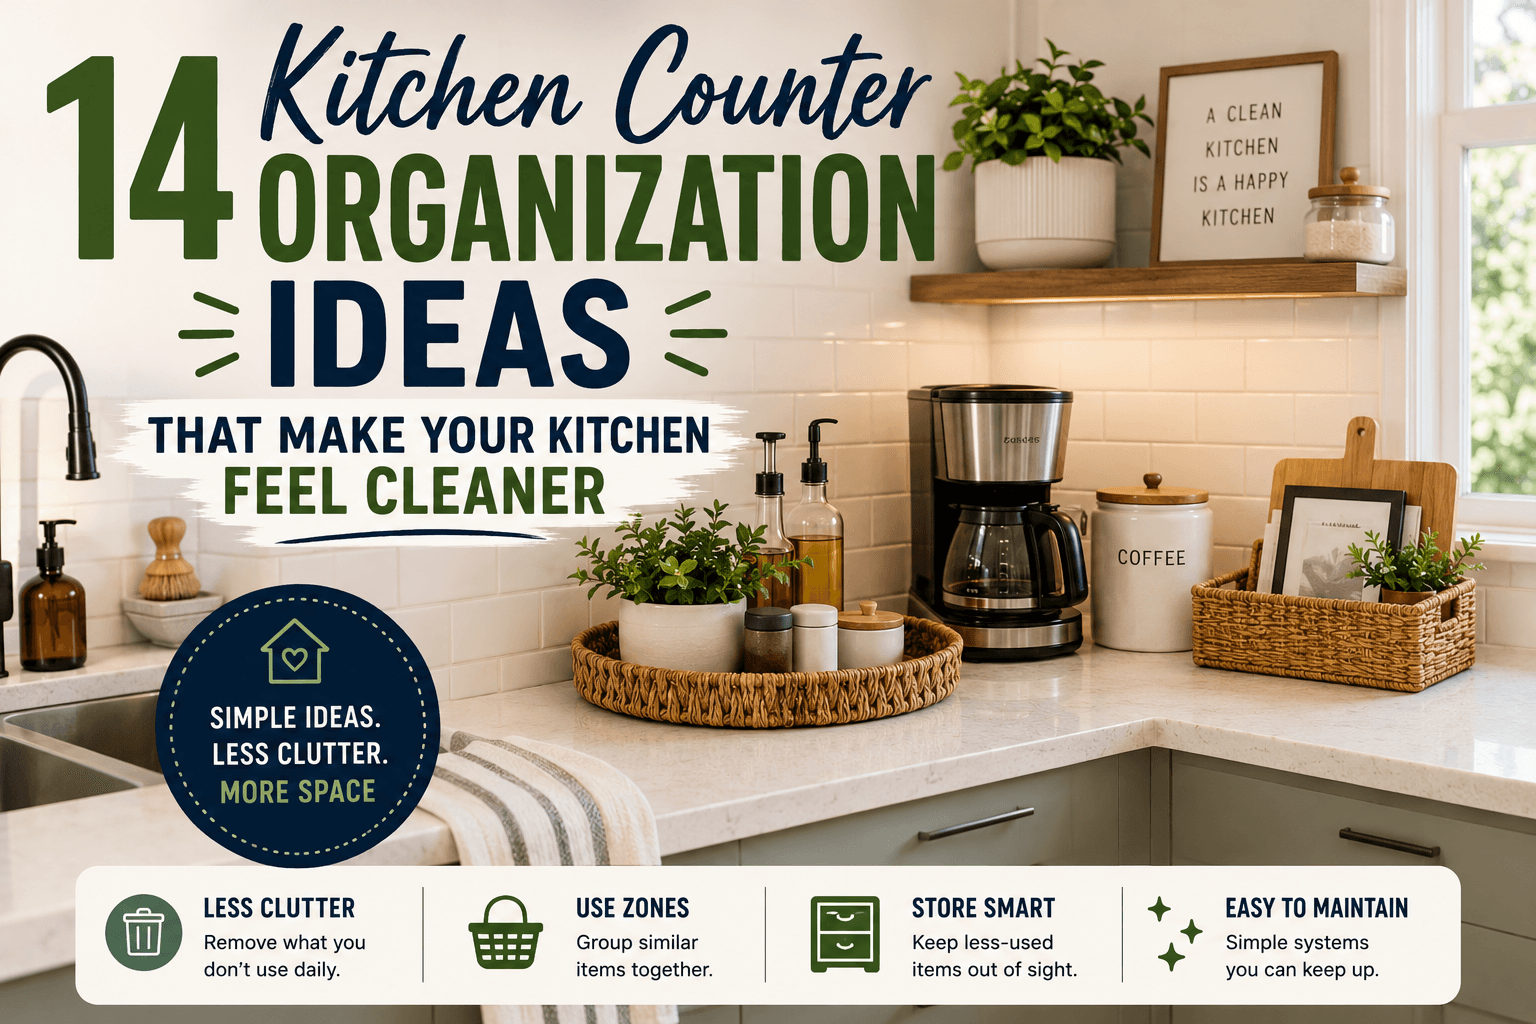
14 Kitchen Counter Organization Ideas That Make Your Kitchen Feel Cleaner
Kitchen counters can get messy faster than almost any other spot in the house.
One minute it’s just a coffee mug and a piece of mail. Then somehow there are keys, snack wrappers, school papers, a phone charger, vitamins, a cutting board, and three appliances nobody is using right now.
That’s why good kitchen counter organization ideas matter. Not the kind that makes your kitchen look like nobody lives there. The kind that gives everyday stuff a place to go so your counters don’t feel crowded all the time.
This is especially helpful in small apartments, rentals, older homes with limited cabinets, and busy family kitchens where the counter becomes the command center for everything. You don’t need to buy a bunch of containers. You just need better zones, fewer things sitting out, and a simple reset that’s easy to repeat.
Table of Contents
Kitchen Counter Organization Ideas That Actually Work
Before organizing your kitchen counter, look at what keeps landing there.
Is it mail? Dishes? Appliances? Kids’ snacks? Vitamins? Coffee supplies? Random things from pockets? The best kitchen organization tips are based on your real mess, not some perfect pantry photo.
A clean counter doesn’t mean empty. It means the things sitting out are useful, intentional, and easy to maintain.
1. Start by Removing What Doesn’t Belong
First, take everything off the counter that clearly belongs somewhere else.
Move mail, toys, tools, bathroom items, receipts, laundry, school papers, and random clutter out of the kitchen.
Why it works: kitchen counters often become storage for the whole house. Removing non-kitchen items makes the space feel cleaner before you even organize anything.
Example: In a busy family home, the counter may collect permission slips, toys, sunglasses, and unopened packages. Put papers in one tray, toys in a basket, and packages near the entry or office area.
Small warning: Don’t start deep organizing every item right now. This step is just about removing obvious counter clutter.
2. Keep Only Daily-Use Items on the Counter
Be honest about what you use every day.
Coffee maker? Maybe yes. Stand mixer? Probably not unless you bake all the time. Toaster? Depends on your routine.
Why it works: every item on the counter takes up visual and working space. Keeping only daily-use items makes cleaning and cooking easier.
Example: In a small apartment kitchen, you might keep the coffee maker and knife block out, but store the blender and slow cooker in a cabinet.
Small warning: Don’t hide things you truly use daily just to make the counter look empty. The system still needs to work for real life.
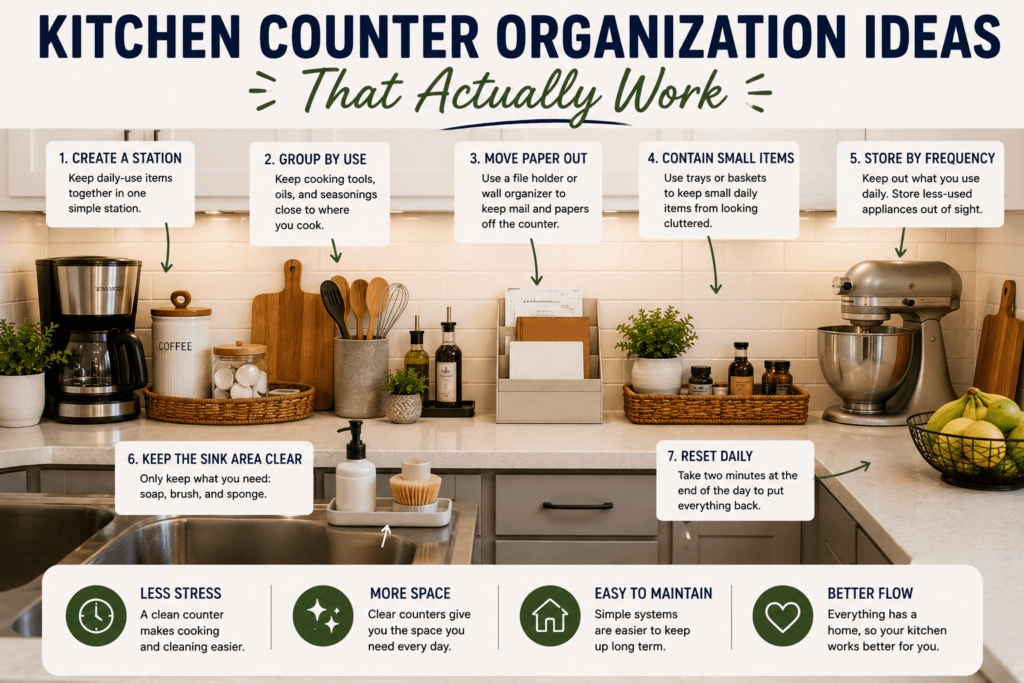
3. Create a Coffee or Tea Station
If coffee supplies spread across the counter, group them into one small zone.
Keep mugs, coffee pods, filters, tea bags, sugar, or spoons near the coffee maker if space allows.
Why it works: a station keeps related items together and prevents them from spreading across the whole counter.
Example: Use a small tray beside the coffee maker for sugar, coffee pods, and a spoon rest. In a rental with limited cabinets, a small shelf or mug tree can help too.
Small warning: Don’t let the coffee station become too large. If it takes over half the counter, it’s time to move some supplies into a cabinet.
4. Use a Tray to Contain Small Items
A tray can make everyday counter items look neater.
Use one for cooking oils, salt and pepper, vitamins, coffee supplies, or dish soap and hand soap.
Why it works: trays create a boundary. Items look more intentional when they’re grouped instead of scattered.
Example: Put olive oil, salt, pepper, and a small spoon rest on a tray near the stove. It keeps the area useful but not messy.
Small warning: If the tray is packed full, it becomes clutter with edges. Keep it limited.
5. Move Paper Clutter Off the Counter
Mail and papers can make even a clean kitchen look messy.
Create a paper landing zone somewhere else if possible: a wall file, entryway tray, desk basket, or family command center.
Why it works: papers spread fast and don’t belong in food prep areas.
Example: In a small home, use one wall-mounted file near the kitchen entrance for mail and school papers instead of letting them pile up beside the sink.
Small warning: Don’t use a deep basket for papers unless you sort it often. Deep baskets turn into paper caves.
6. Store Appliances by How Often You Use Them
Rank appliances by use.
Daily appliances can stay out. Weekly appliances can go in an easy cabinet. Rarely used appliances can go higher, lower, or into another storage area.
Why it works: small kitchen counter space should be saved for tasks you do every day.
Example: If you use the air fryer twice a week but the toaster once a month, the air fryer gets easier storage. The toaster can move.
Small warning: Don’t store heavy appliances too high. It’s not worth risking a dropped mixer just to clear the counter.
7. Use Wall or Cabinet Space When Possible
Look around the counter, then look up.
Use hooks, shelves, magnetic strips, cabinet doors, or wall-mounted racks if your space and lease allow it.
Why it works: vertical storage frees counter space without needing more cabinets.
Example: In a rental kitchen, removable hooks inside a cabinet door can hold measuring spoons or lightweight tools. A magnetic strip can work well if it’s installed safely and allowed.
Small warning: Renters should check lease rules before drilling or mounting anything. Adhesive products can still damage paint or cabinet finishes.
8. Add a Small Basket for “Leave the Kitchen” Items
Some things land on the counter because people are passing through.
Use one small basket for items that need to leave the kitchen later.
Why it works: it keeps the counter from becoming a scattered drop zone while still giving random items a temporary place.
Example: Put keys, small toys, receipts, and chargers in one basket during the day. Empty it at night or when you reset the kitchen.
Small warning: The basket is temporary. If it stays full all week, it’s just another clutter spot.
9. Keep Cooking Tools Near the Stove
Store the tools you use while cooking close to the stove.
This might include a utensil crock, spatula, wooden spoon, tongs, or a small spoon rest.
Why it works: when tools are easy to grab and put away, cooking feels smoother and the counter stays cleaner.
Example: In an older kitchen with limited drawer space, a simple utensil crock can work better than cramming everything into one small drawer.
Small warning: Don’t keep every kitchen tool in the crock. Only keep the ones you reach for often.
10. Use Clear Space Around the Sink
The sink area can make the whole kitchen feel clean or messy.
Keep only what you need: dish soap, hand soap, sponge or brush, and maybe a small tray.
Why it works: sink clutter looks messy and makes wiping the counter harder.
Example: Put dish soap and a scrub brush on a small sink tray. Store extra sponges and cleaning supplies under the sink.
Small warning: Let sponges and brushes dry properly. Wet tools trapped in containers can smell bad.
11. Group Oils, Spices, and Seasonings
Instead of spreading cooking items around, group them.
Use a tray, small basket, lazy Susan, or cabinet shelf for oils and seasonings.
Why it works: grouped items are easier to clean around and easier to find.
Example: Keep olive oil, salt, pepper, and your most-used seasoning near the stove. Put less-used spices in a cabinet or drawer.
Small warning: Avoid storing oils right next to high heat or direct sunlight for long periods. Check storage instructions when needed.
12. Make Snacks Easier to Put Away
Snacks often end up on counters because people grab them all day.
Create one snack spot in a cabinet, pantry, basket, or drawer.
Why it works: when snacks have a clear home, they’re less likely to sit out after everyone is done eating.
Example: In a family kitchen, use one low pantry bin for kids’ snacks so they can grab what they need and put things back.
Small warning: Don’t keep too many snacks on the counter “for convenience.” It usually creates more mess.
13. Use Drawer Space Better Before Buying Organizers
Before buying counter storage, check your drawers.
Remove duplicates, broken tools, old takeout packets, random lids, and anything you don’t use.
Why it works: a messy drawer can push items onto the counter. Fixing drawer space can clear the counter without buying anything.
Example: If your utensils are on the counter because the drawer is packed, empty the drawer and remove extras first. You may not need a counter holder at all.
Small warning: Don’t buy drawer organizers before measuring. A divider that doesn’t fit is just another thing to store.
14. Do a Two-Minute Counter Reset
At least once a day, reset the counter for two minutes.
Put away food, move papers, toss trash, wipe crumbs, and return items to their zones.
Why it works: counters get used every day. A short reset keeps the mess from becoming a full kitchen cleanup.
Example: After dinner, clear the island or main prep counter first. Waking up to that clean space makes the kitchen feel less stressful.
Small warning: Don’t turn this into a full deep clean. Keep it quick so you’ll actually do it again.
Common Mistakes to Avoid
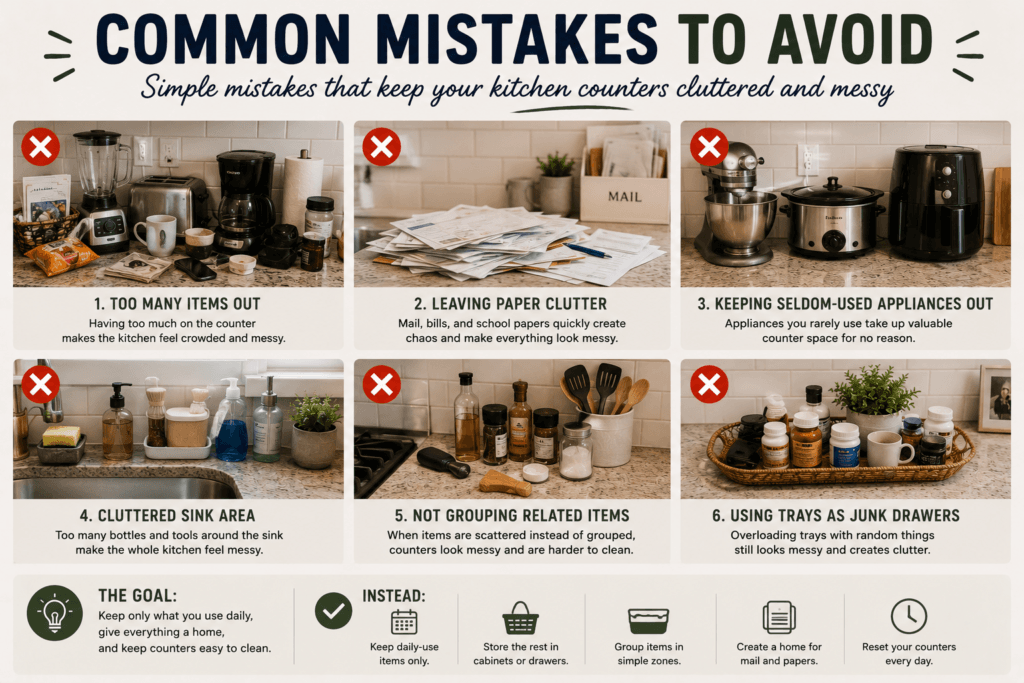
Keeping Too Many Appliances Out
Appliances are useful, but too many on the counter can make the kitchen feel crowded. Keep out only what you use often.
Buying Organizers Before Decluttering
Counter organizers won’t help if they’re holding things that don’t belong on the counter. Remove first, organize second.
Letting Paper Piles Stay in the Kitchen
Mail, school forms, receipts, and bills can take over quickly. Give paper clutter a separate home.
Making the Counter Too Empty to Use
A clear counter is nice, but it still needs to work. Keep daily-use items accessible.
Ignoring the Sink Area
A messy sink area can make the whole kitchen feel dirty. Keep it simple and easy to wipe.
Not Resetting Daily
Kitchen counters are high-use spaces. Even a good system needs a quick daily reset.
Quick Checklist: Kitchen Counter Organization
Use this when your kitchen counter feels cluttered:
- Remove non-kitchen items
- Toss trash and old papers
- Keep only daily-use appliances out
- Create a coffee or tea zone
- Use one tray for small items
- Move mail to a paper station
- Store rare appliances elsewhere
- Keep sink supplies simple
- Group oils and seasonings
- Make snacks easy to put away
- Clear one main prep area
- Do a two-minute reset daily
Conclusion
Good kitchen counter organization ideas are not about having empty counters all the time. They’re about making your kitchen easier to use and easier to clean.
Start by removing what doesn’t belong. Then keep daily items in simple zones, move paper clutter somewhere else, and give appliances a home based on how often you use them.
A kitchen counter doesn’t have to be perfect to feel better. It just needs enough clear space to make everyday cooking, cleaning, and living a little less annoying.